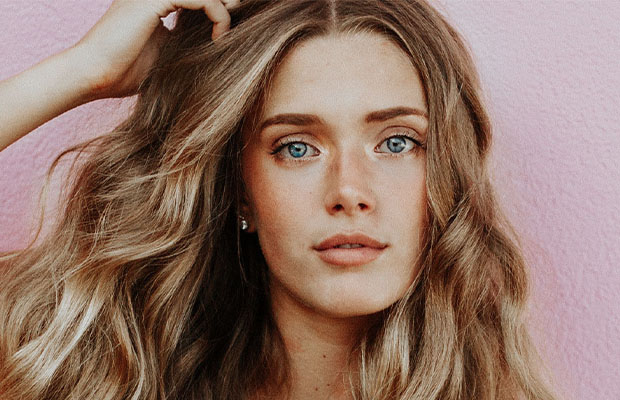
Beach wavy long hair is a go-to celebrity hairstyle for good reason: Because of how effortlessly they look on all face shapes, hair types, and age groups, they are flattering on just about everyone. We’ll show you how to create a beach wavy at home with long hair!
Beach waves are add texture and movement to hair. They are effective on a wide range of hair lengths and types. Your hair can benefit greatly from the loose waves, which can give it both movement and more volume.
Learn more by continuing to read.
What is the Beach Waves Hair?
When people request beach waves, they’re usually referring to soft waves with straighter ends created by wrapping hair around a hair wand or bending into the hair with a flat iron.
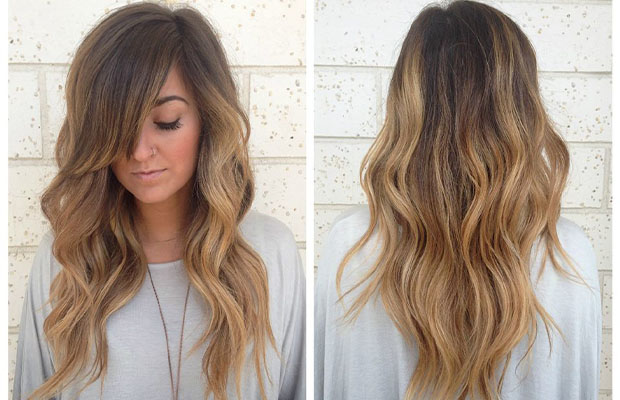
There isn’t a hairstyle that women around the world adore more than beach waves, so think long and hard about it.
Simply put, it is flattering to all body types and versatile.
Also Read: Peekaboo Knotless Braids
How to Get Beach Wavy Long Hair? 6 Steps
Here is our detailed instruction manual on getting beach wavy long hair.
Step 1: Prep Your Hair
This is a crucial step to take if your hair doesn’t hold curl. When I start with wet hair, mousse works great as a product to give my hair hold. Finally, I blow-dry my hair. I have straight hair so I can get away with a pretty rough dry. Anyone with curly hair will need to concentrate on straightening it as they blow dry. Sea salt spray will give your hair a lot of texture and a truly beachy appearance. Before or after blow-drying your hair, you can add it.
When starting with dry hair, it is usually day (or two) old hair, so I apply some dry shampoo. This is by far my favorite! A texture spray is also used. It helps with the pieciness I like when making beach waves while also giving your hair some hold and grit.
Step 2: Divide Hair in Layers and Spray in Heat Protectant
I have layers in my hair. I separate my thick hair into three horizontal sections. You may only need 2 sections, depending on the length of your hair. I clip up the top two so that only my bottom layer is unbound, and I spray some heat protectant on top of that. These clips are great for holding up your sections because they can hold a lot of hair and leave no dents or marks in my hair.
Every type of hair will benefit from heat protectants. Use a heat protectant on your hair at all times, even if you don’t use any other products on it. You’ll be so grateful you did it when you don’t have breakage from heat because it prevents damage to your hair!
Step 3: Take a Section and Curl
I take a one-inch section of hair beginning closest to my ear. Take larger sections for really loose waves, but smaller pieces for waves with more definition. With a 1&Prime curling iron (I adore this one), I clamp the section halfway down its length and curl it up to the root. Any curls or waves I have always face away from my curls. My hair lays better, and I believe it is more flattering.
I let go of the curling iron clamp after some time has passed. In order to create a tighter curl as the top section of hot hair is released from the curling iron, I turn the iron as I slide down my section of hair to the end. I then repeat this procedure on the bottom half of the section: curl it away from my face, and then, as you let go of the iron, twirl it into a tighter curl.
You can get beach waves by twirling your hair in circles. You’ll get more of the look of loose waves rather than big round barrel curls. This might seem a little difficult at first, but I assure you that it becomes simple after a while. I occasionally experiment with the size of the sections I employ. The loose waves will be softer and less distinct the more sections there are.
Try smaller sections at first if you have shorter hair. This will guarantee that you catch some waves. On short hair, using too many large sections won’t give you much of a loose wave effect. It will be too subdued.
Step 4: Repeat
I complete curling the initial side using the same method. I take care to keep curling away from my face as I turn to the opposite side. I don’t comb or otherwise manipulate the curl in any way. When I have finished with the entire layer, I let down the following layer and apply heat protectant. Finally, I proceed to the top layer and begin curling.
I don’t use hair spray on my curls, but if your hair doesn’t hold curls well, spray each layer of curls with hair spray before adding the next.
Step 5: Let Hair Cool
Once I’ve finished curling each piece, I don’t touch it again. This is an essential step in maintaining any kind of curls. Wait until they are completely cool to the touch before handling or using them. For long or short hair, this is crucial because it enables the curl to really set. You still need the curt to set even if all you want are loose waves. Your curls won’t hold throughout the day if you don’t. Do not omit this phase!
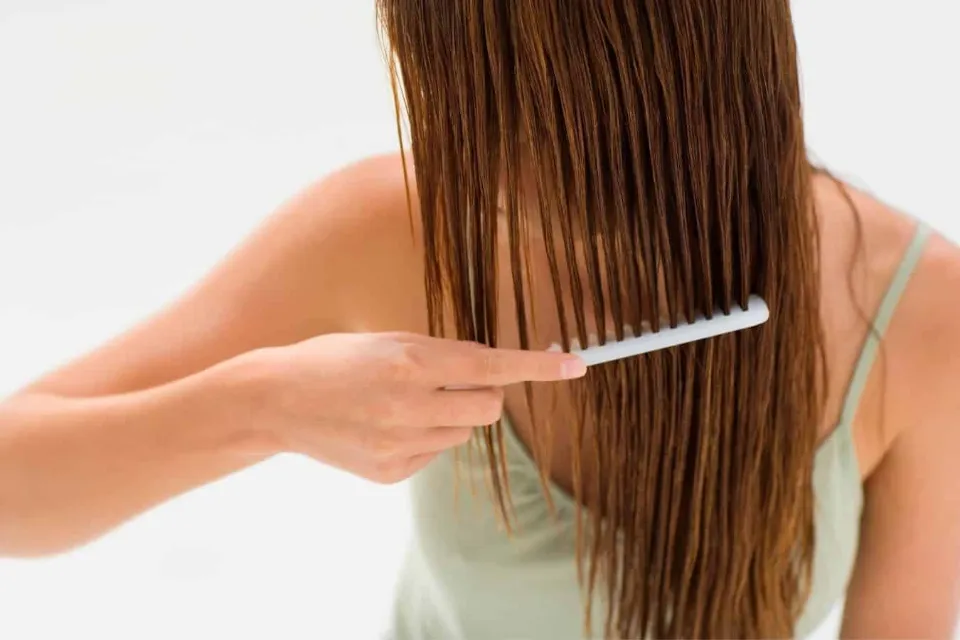
STEP 6: SEPARATE the CURLS & FINISH the STYLE
I gently separate the curls either with my fingers or a wide-tooth comb. I try to work on one hair section at a time. To achieve beach waves, I want to loosen up my hair’s curl pattern and add movement.
I use different pressures when brushing out the curls depending on the look I want. I always make sure to create volume at the roots when applying makeup with my hands. When you comb your hair, be mindful of the type of hair you have. If your hair has trouble keeping a curl, treat it with more care. After brushing out the curls, if they are still too tightly curled, continue brushing until the waves are loose.
You May Also Like: How To Do The Low Bun Hairstyle?
Tips for Hair That Doesn’t Curl Well
- When hair is wet make sure to use a light styling product
- Use texture spray before curling
- Spray each layer of hair with hair spray after curling
- Make each section small
- Allow to cool completely
Final Words on Beach Wavy Long Hair
Beach waves without the heat and without dipping your hair into salty water? Beach waves have always been one of the most sought-after hairstyles, so yes, please. It’s a breezy appearance that is in style year-round and never goes out of style.
If you’re looking to create those perfect beach wavy long hair, then you’re going to love this simple hair curling technique that will not only look pretty once set but it is also heat and damage free!
There is no need for a beach, a curling iron, or a straightener!
Read More:
FAQs
How to Get Beach Waves Short Hair?
If your short hair can’t hold a curl to save its life, spritz your damp hair with a sea-salt spray before drying it, then blast your roots and ends with texturizing spray before and after curling it.
What Tool is Best for Beachy Waves?
A curling iron works the best for getting beachy waves. It gives your hair the ideal shape and volume to pull off the style.
How Long Do Beach Wave Curls Last?
With the proper care, you can expect your beach wave perm to last about six months.