One of the most attractive hairstyle trends is waterfall braids. But do you know how to do waterfall braids?
Today, we’re returning to the fundamentals and demonstrating a waterfall braid step by step. You might find creating this hairstyle a little confusing at first, but with some practice, you’ll get the hang of it.
There are so many variations of this hairstyle that you can do once you master the fundamental technique.
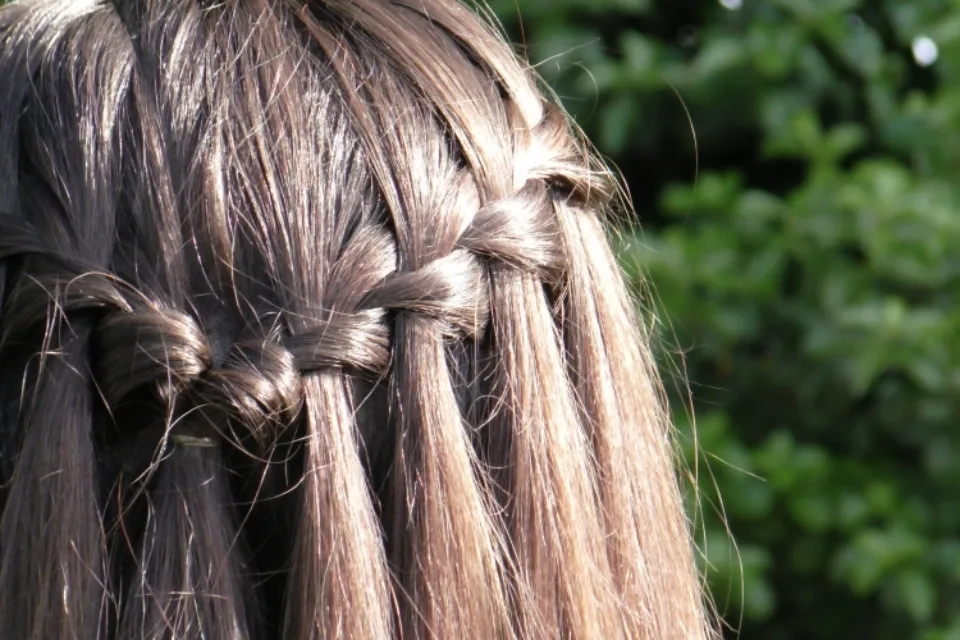
What Are Waterfall Braids?
A waterfall braid is a half-French braid in which part of the hair is braided and the rest is left to cascade down, like a waterfall.
The waterfall braid might seem difficult or complicated because you’re used to making full braids, but it’s actually just a few simple, repetitive steps!
You Might Also Like: What is An Inverted Bob?
How to Do Waterfall Braids?
Continue reading below for step-by-step instructions on how to create a waterfall braid.
What You Need
- Elastic bands
- Hair pins
- Texture powder
- Hairspray
- Brush and comb
Add Volume
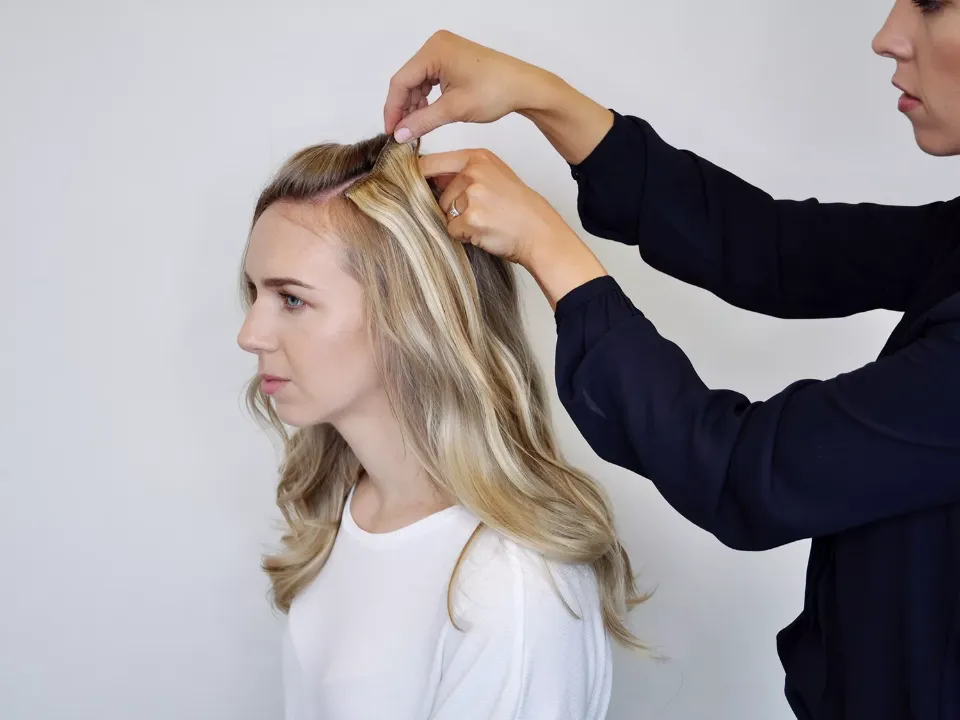
To give our braid more thickness and volume at the sides, we subtly added teeny, tiny clip-in extensions close to the root.
Here’s a pro tip for creating a thicker waterfall braid without sacrificing fullness or length, especially at the sides.
Your clip-in pieces may need to be measured and trimmed. Each side of the hidden clip-in was about an inch long.
Section Hair
Make a deep side part, then take a chunk of right-side hair and divide it into three sections.
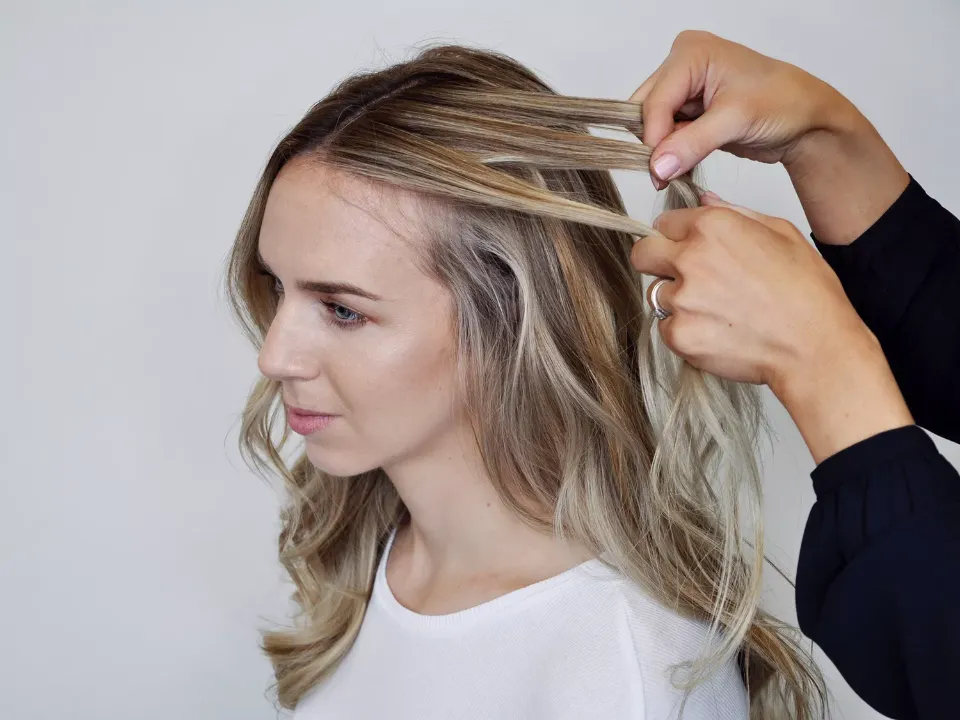
Cross the Sections
Cross the top section of hair that is closest to your hairline over the middle, letting it hang.
Create the Waterfall
After that, cross the bottom piece over the new middle piece. Now, leave the hanging piece hanging to create the waterfall effect rather than crossing it like you would with a regular French braid. Next, cross the top and bottom pieces once over one another.
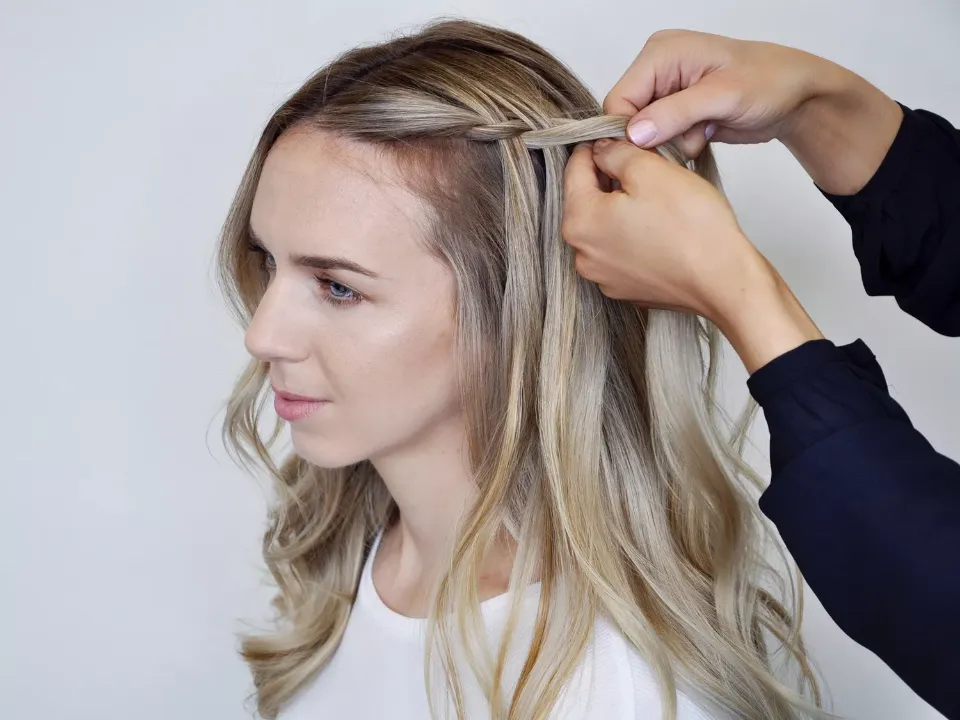
Repeat Steps
Once you’ve reached the length of braid you want, keep going through this sequence, repeating steps 3 and 4, over and over.
As the braid forms, don’t forget to grab a fresh section of hair from above, place it in the center, and lower it. The waterfall effect starts to really take shape at this point.
Elevate Your Braid
Twist the final two pieces together to form the braid’s final section, then secure it with an elastic. Put two bobby pins in an X shape and tuck the braid’s end under the rest of your hair to hold it in place.
This final step aids in keeping your braid firmly in place. To give your braid a lived-in, fuller appearance, dust it with a little texture powder and slightly separate it.
You Might Also Like:
- How to Do Box Braids?
- How to Do Dutch Braids?
- How to Do French Braids?
- How to Do Bubble Braids?
- How to Do Knotless Braids?
- How to Do Fishtail Braids?
Summary: How to Do Waterfall Braids
You should know how to do waterfall braids now.
A timeless hairstyle that looks stunning and one-of-a-kind is the waterfall braid.
This classic hairstyle is a go-to for any occasion, from beach days to weddings, whether you’re dressed up or down.
FAQs About Waterfall Braids
Are Waterfall Braids Hard?
This technique isn’t particularly hard, but it can be arm-tiring and takes a bit of practice to get an even-looking result.
Is It Easier to Braid Wet Or Dry?
Extensions, twists, and braids are typically applied to dry hair.